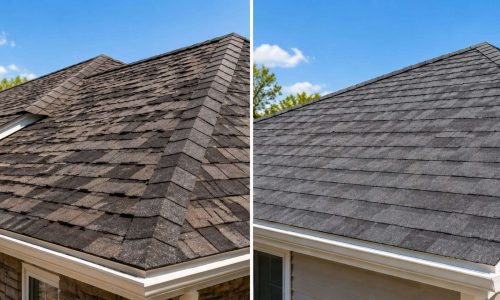

If you’ve been told your roof needs to be power washed before a rejuvenation treatment, you might want to pump the brakes. That advice, while well-intentioned, is not always accurate – and in some cases, it can actually cause more harm than good.
Roof rejuvenation is one of the more misunderstood services in the home exterior industry right now. Homeowners hear the word “rejuvenation” and assume it involves a full deep-clean followed by some kind of spray-on coating. But the preparation process is a lot simpler – and a lot more specific – than most people expect.
Here is what you actually need to know before a rejuvenation product gets applied to your roof.
What Roof Rejuvenation Actually Does
Before getting into preparation, it helps to understand what rejuvenation is doing at a chemical level. Asphalt shingles are made from bitumen, a petroleum-based material that gives shingles their flexibility and water resistance. Over time, heat, UV exposure, and weathering cause the oils in that bitumen to dry out.
When those oils disappear, shingles become brittle, start to crack, and lose their ability to shed water effectively. Roof rejuvenation products – including well-known options like Roof Maxx and GoNano – work by reintroducing those oils back into the shingle.
- Roof Maxx, for example, uses a soybean-derived oil that has been developed with backing from the Iowa Soybean Association (ISA) and has received interest from agricultural technology researchers connected to the United States Department of Agriculture.
- GoNano uses a different approach through nanotechnology, embedding protective compounds at a microscopic level.
Both approaches share the same goal: restore flexibility, slow granule loss, and extend the life of your existing asphalt shingle roof.
Why Skipping the Power Wash Makes Sense
This is the part that surprises most homeowners. Many roofers who apply rejuvenation products specifically advise against pressure washing before treatment.
The reason comes down to how the product is absorbed:
- Rejuvenation oils are designed to penetrate the surface layer of the shingle and bond with the bitumen below.
- A freshly power-washed shingle surface can strip away the very granules that help the product adhere, and wet shingles can dilute the treatment and reduce penetration.
Think of it like applying a wood conditioner to a soaking-wet deck. The water blocks absorption and the product never gets where it needs to go.
That said, preparation is not zero work. It is just different work.
How to Actually Prepare Your Roof for Rejuvenation
Step One: Clear Debris Without Pressure
Remove leaves, pine needles, and accumulated debris from your roof surface and gutters. You can do this with a soft-bristle broom or a leaf blower. The goal is to clear the path for the treatment to reach the shingle surface – not to scrub the shingle clean.
Avoid metal rakes or stiff brushes that could knock off granules. Those granules are part of what the rejuvenation is trying to protect.
Step Two: Trim Overhanging Branches
This is a step that matters beyond just aesthetics. Overhanging branches deposit debris consistently and keep certain sections of your roof shaded and damp.
Moisture buildup accelerates the kind of organic growth – moss, algae, lichens – that can interfere with rejuvenation absorption. Trim back any branches that hang directly over your roof before the application day.
Step Three: Address Moss or Algae Growth
If you have visible moss or algae on your shingles, that needs to be treated before any rejuvenation product goes down. Moss physically lifts shingles and holds moisture against the surface. Algae creates a biofilm layer that can prevent oil-based treatments from penetrating.
A qualified roofer can treat moss and algae using appropriate products that kill growth without damaging the shingle surface. This is not a DIY pressure-wash situation. The goal is targeted treatment, not water-blasting the roof into submission.
Step Four: Schedule an Inspection First
Before any rejuvenation application, your roof should be inspected. This step is not optional, and any reputable company offering roof rejuvenation should insist on it. The inspection determines whether your shingles are actually good candidates for rejuvenation.
Shingles that are already cracked, curling severely, or missing granules in large patches may be too far gone for a treatment to be effective. Rejuvenation extends the life of a roof that still has structural integrity – it is not a patch job for a roof that is already failing.
This also matters from an insurance standpoint. Some homeowners assume that applying a rejuvenation product qualifies as a repair that affects their coverage. Having a documented inspection on file protects you if questions arise later.
Step Five: Check Your Flashing
Flashing – the metal strips installed around chimneys, skylights, vents, and roof edges – plays a critical role in keeping water out. Before any treatment, make sure the flashing is intact and properly sealed.
Damaged or lifted flashing can create entry points for water even after a successful rejuvenation treatment. A good roofer will flag any flashing issues during the inspection, but it is worth specifically asking about it.
Is Roof Rejuvenation Legitimate?
A fair question. The number of people typing “Roof Rejuvenate scam” into search engines suggests there is a lot of skepticism out there – and some of it is warranted. Like any growing service category, roof rejuvenation has attracted both legitimate companies and opportunistic ones.
Products like RoofMaxx have established track records, published data on effectiveness, and clear guidance about which roofs qualify. GoNano represents a newer technology with a different delivery method. Both are real products backed by real research.
The key is to work with a roofer who gives you an honest assessment upfront. If someone is willing to sell you a rejuvenation service without first inspecting your roof, that is a warning sign. Legitimate application starts with knowing whether your specific roof can actually benefit.
What to Expect on Application Day
Once your roof has been properly prepared – debris cleared, organic growth treated, flashing confirmed, and inspection complete – the actual application process is relatively straightforward.
- The rejuvenation product is typically applied using a sprayer system that distributes the oil evenly across the shingle surface.
- Application usually takes a few hours depending on roof size.
- There is typically a short curing window afterward where foot traffic on the roof should be avoided.
No rinsing. No washing. No follow-up scrubbing required.
How to Prepare Your Roof for Rejuvenation Application
Preparing your roof for rejuvenation is less about cleaning and more about setting the right conditions for the product to do its job. Clear the debris, handle organic growth correctly, get a proper inspection, and confirm your flashing is solid.
If you are in Spokane and want to know whether your roof is a good candidate, the team at Balsamroot Exteriors is ready to take a look. Reach out through our roofing rejuvenation page to get started with an honest, no-pressure assessment.